
Carving a chicken is an essential skill in the kitchen, whether for a family dinner or a festive occasion. Proper carving not only enhances the presentation but also ensures that each piece is easy to serve and enjoy. This comprehensive guide will cover everything you need to know about carving a chicken, from the basic techniques to advanced tips and troubleshooting.
1. Introduction to Carving a Chicken
Why Carve a Chicken?
Carving a chicken allows for easier serving and portion control, and it helps maximize the yield from a whole bird. Proper carving techniques can also enhance the visual appeal of the dish, making it more attractive for presentation.
Tools You’ll Need
- Sharp Chef’s Knife: Essential for clean cuts through meat and bone.
- Carving Fork: Helps stabilize the chicken while carving.
- Cutting Board: A sturdy, non-slip surface to work on.
- Boning Knife (Optional): Useful for more detailed work, such as removing bones.
2. Preparing the Chicken for Carving
1. Let the Chicken Rest
- Why Resting Matters: Allowing the chicken to rest for 10-15 minutes after roasting helps the juices redistribute throughout the meat, making it juicier and easier to carve.
- Covering: Tent the chicken loosely with aluminum foil to keep it warm while it rests.
2. Set Up Your Workspace
- Board Position: Place your cutting board on a stable surface and ensure it’s large enough to handle the whole chicken.
- Tools Ready: Have your knife, carving fork, and any other tools within reach.
3. Carving Techniques
1. Carving the Chicken
Step-by-Step Process
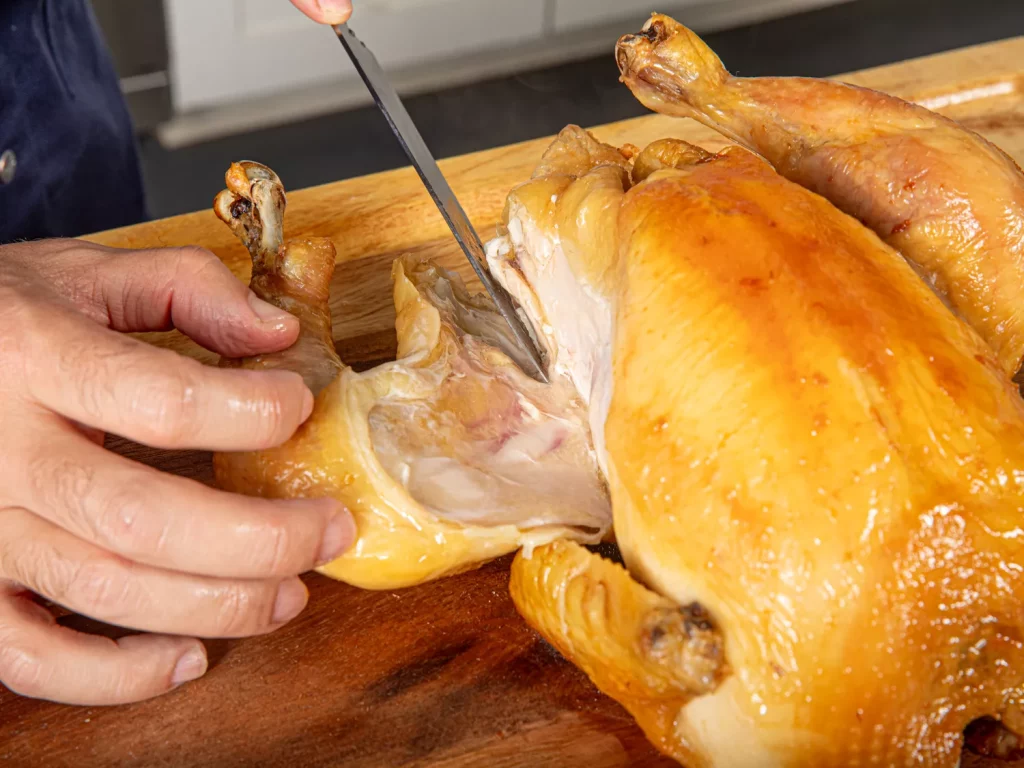
1. Remove the Legs
- Locate the Joint: Hold the chicken steady with the carving fork. Cut through the skin between the leg and the body, then find the joint connecting the thigh to the body.
- Disjoint the Leg: Bend the leg back to expose the joint, then cut through the joint with your knife. Repeat for the other leg.
- Separate Thigh from Drumstick: Place the leg skin-side down. Cut between the thigh and drumstick at the joint to separate them.
2. Remove the Wings
- Locate the Joint: Similar to the legs, cut through the skin and find the joint connecting the wing to the body.
- Disjoint the Wing: Pull the wing out to expose the joint, then cut through with your knife. Repeat for the other wing.
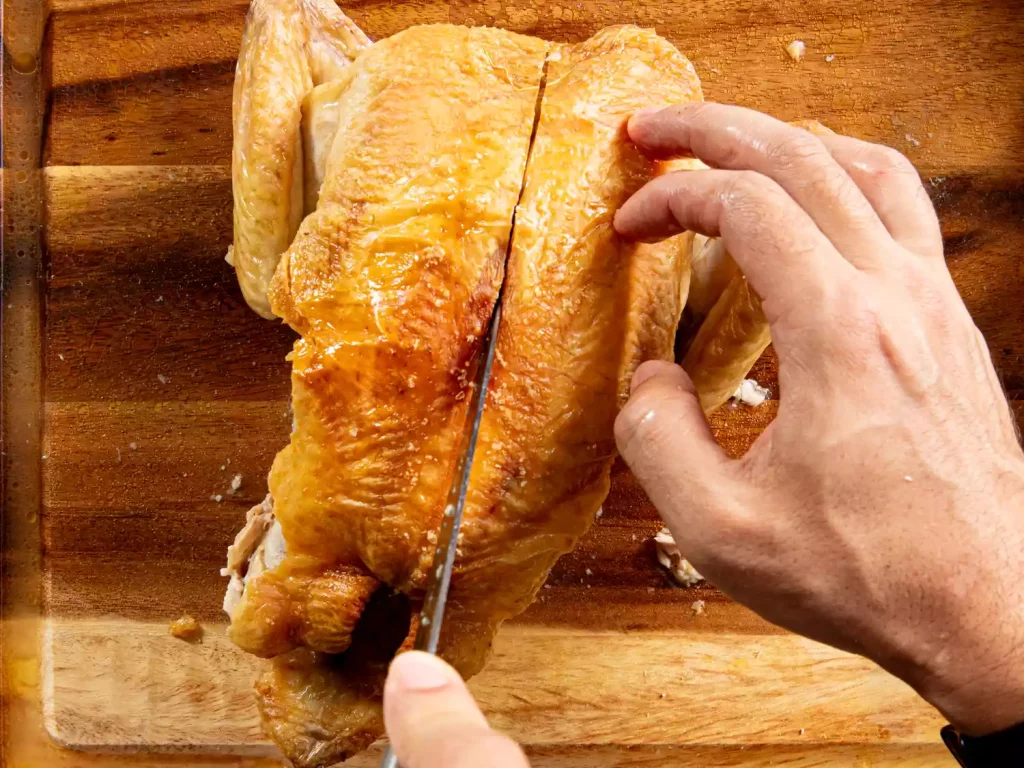
3. Carve the Breast Meat
- Find the Breastbone: Place the chicken breast-side up. Start by making a cut along one side of the breastbone.
- Remove the Breast Meat: Work your knife along the rib cage, following the contour of the bones to separate the breast meat from the carcass. Repeat for the other side.
- Slice the Breast Meat: Place the breast meat skin-side up and slice it crosswise into even portions.
4. Carve the Back and Carcass
- Remove the Back: Use your knife to cut through the bones connecting the back to the body. This step is optional, depending on how you plan to use the carcass.
- Separate Remaining Meat: After removing the back, you can separate any remaining meat from the bones for use in other dishes or for making stock.
4. Advanced Carving Techniques
1. Boning the Chicken
- Purpose: Boning is useful if you need to remove bones for recipes like chicken roulade or stuffed chicken.
- Technique: Use a boning knife to carefully cut around the bones, keeping the knife close to the bone to avoid losing too much meat.
2. Spatchcocking the Chicken
- What is Spatchcocking?: This technique involves removing the backbone to flatten the chicken, making it cook more evenly.
- How to Spatchcock: Use kitchen shears or a sharp knife to cut along each side of the backbone. Press down on the breast to flatten the chicken.
3. Carving for Presentation
- Presentation Tips: Arrange the carved chicken attractively on a platter. Consider layering the meat and garnishing with fresh herbs or vegetables for visual appeal.
5. Troubleshooting Common Carving Issues
1. Uneven Cuts
- Solution: Ensure your knife is sharp and your cuts are deliberate. Work slowly and make clean, steady cuts.
2. Meat Sticking to the Bone
- Solution: Use a boning knife for precision and be sure to let the chicken rest before carving to make it easier to separate the meat from the bone.
3. Difficulty Removing the Skin
- Solution: Use your fingers to gently peel away the skin or make small incisions to help separate it from the meat.
6. Tips for Perfect Carving
1. Use a Sharp Knife
- Importance: A sharp knife ensures clean cuts and reduces the effort needed to carve the chicken.
2. Carve with Confidence
- Approach: Make decisive cuts and work methodically. Confidence will help you achieve better results and make the process smoother.
3. Keep the Knife Blade Clean
- Technique: Wipe the blade periodically to remove any fat or juices, which can make the knife slippery and harder to control.
4. Use Proper Technique
- Control: Hold the chicken steady with the carving fork and use the knife to make controlled, clean cuts.
7. Additional Techniques for Different Types of Poultry
1. Turkey Carving
- Differences: Turkey carving involves similar techniques but on a larger scale. The breast and leg portions are typically larger, requiring more effort.
- Special Considerations: Allow a longer resting period and use a larger carving fork and knife.
2. Duck Carving
- Differences: Duck meat is fattier and has a different texture. Carve through the skin and fat carefully to avoid a mess.
- Special Considerations: Use a boning knife to help with separating the meat from the bones.
3. Cornish Hen Carving
- Differences: Cornish hens are smaller and easier to handle. Carving is similar but on a smaller scale.
- Special Considerations: Use a smaller knife for more precision and ease.
8. Recipes and Uses for Carved Chicken
1. Chicken Salad
- Ingredients: Shredded or chopped chicken mixed with mayo, celery, onions, and herbs.
- Instructions: Combine the chicken with the other ingredients and serve chilled.
2. Chicken Soup
- Ingredients: Carved chicken added to a broth with vegetables, noodles, or rice.
- Instructions: Simmer the chicken with the broth and vegetables until flavors meld.
3. Chicken Tacos
- Ingredients: Shredded chicken mixed with taco seasoning and served in tortillas.
- Instructions: Warm the tortillas and fill with seasoned chicken and your favorite toppings.
4. Chicken Stir-Fry
- Ingredients: Chicken pieces stir-fried with vegetables and sauce.
- Instructions: Stir-fry the chicken with vegetables and sauce until cooked through.
9. Cleaning and Maintaining Your Tools
1. Knife Care
- Cleaning: Wash knives with warm soapy water and dry immediately to prevent rust.
- Sharpening: Regularly sharpen your knives to maintain their effectiveness.
2. Board Care
- Cleaning: Clean cutting boards with hot soapy water after each use. For wooden boards, use a mixture of salt and lemon juice to remove odors.
- Sanitizing: Sanitize boards periodically, especially after handling raw poultry.
10. Conclusion
Carving a chicken properly can elevate your meal presentation and enhance your dining experience. With the right tools, techniques, and a bit of practice, you can master the art of carving and make every meal a success. Whether you’re preparing a simple family dinner or a grand feast, these skills will ensure that your chicken is served perfectly every time. Enjoy your culinary endeavors, and happy carving!