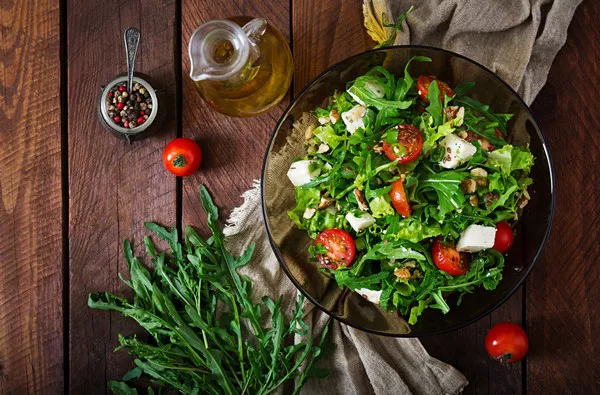
A barbecue cookout is an American tradition that brings friends and family together to savor the smoky, grilled flavors of various meats. While the star of the show is undoubtedly the meat, a well-chosen selection of barbecue sides can elevate your cookout from good to great. In this comprehensive guide, we’ll explore 9 of the best BBQ sides that will complement your grilled masterpieces and leave your guests craving more.
9 Best BBQ Sides For Your Next Cookout
1. Easy Guacamole (Recipe)
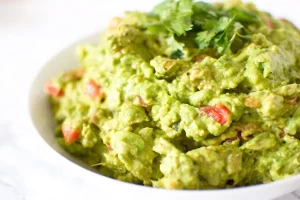
Ingredients:
- 3 ripe avocados
- 1 small onion, finely diced
- 2 Roma tomatoes, diced
- 2 cloves garlic, minced
- 1-2 jalapeño peppers, seeded and minced (adjust to your spice preference)
- 2 tablespoons fresh cilantro, chopped
- 1 lime, juiced
- Salt and pepper to taste
Instructions:
Prep the Avocados: Cut the avocados in half, remove the pits, and scoop the flesh into a mixing bowl.
Mash the Avocado: Use a fork or potato masher to gently mash the avocado until it reaches your desired level of creaminess. Some people prefer chunky guacamole, while others like it smoother.
Add Lime Juice: Squeeze the juice of one lime over the mashed avocado. The lime not only adds a zesty flavor but also helps prevent the guacamole from browning too quickly.
Add Onion and Garlic: Stir in the finely diced onion and minced garlic. These ingredients provide a savory and aromatic kick to the guacamole.
Incorporate Tomatoes: Gently fold in the diced tomatoes. Roma tomatoes work well for guacamole as they have fewer seeds and are less watery.
Introduce Jalapeño Pepper: Add the minced jalapeño pepper for a hint of spice. Remember to adjust the quantity based on your heat tolerance. If you like it milder, remove the seeds and membranes from the pepper before mincing.
Sprinkle with Cilantro: Sprinkle the chopped cilantro over the mixture and stir it in. Cilantro adds a fresh and herbaceous note to the guacamole.
Season with Salt and Pepper: Season the guacamole with salt and pepper to taste. Start with a pinch of salt and a dash of pepper, then adjust as needed.
Taste and Adjust: Taste your guacamole and adjust the ingredients to suit your preferences. You can add more lime juice for tanginess, more jalapeño for heat, or more salt and pepper for seasoning.
Serve Immediately: Guacamole is best served fresh. Enjoy it as a dip with tortilla chips, as a topping for tacos, or alongside your favorite Mexican dishes.
Storage Tips: If you need to store leftover guacamole, press plastic wrap directly onto the surface to minimize air exposure and prevent browning. Refrigerate and consume within a day or two.
2. Keto Bacon-Spinach Dip
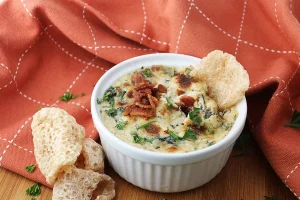
Ingredients:
- 6 slices of bacon, cooked and crumbled
- 8 oz (about 1 cup) cream cheese, softened
- 1/4 cup sour cream
- 1/4 cup mayonnaise
- 1 cup fresh spinach, finely chopped
- 1/4 cup grated Parmesan cheese
- 1/4 cup shredded mozzarella cheese
- 2 cloves garlic, minced
- 1/2 teaspoon onion powder
- 1/2 teaspoon garlic powder
- 1/2 teaspoon dried oregano
- Salt and black pepper to taste
- Chopped fresh chives or green onions for garnish (optional)
Instructions:
Prep the Bacon: Cook the bacon until it’s crispy. You can do this in a skillet over medium heat or in the oven at 350°F (175°C) for about 15-20 minutes. Once cooked, crumble the bacon into small pieces and set it aside.
Prepare the Spinach: Wash and finely chop the fresh spinach. You want it to be finely minced to blend well with the dip.
Mix Cream Cheese and Sour Cream: In a mixing bowl, combine the softened cream cheese, sour cream, and mayonnaise. Mix until the mixture is smooth and well incorporated.
Add Garlic and Spices: Stir in the minced garlic, onion powder, garlic powder, dried oregano, salt, and black pepper. Adjust the seasoning to your taste preferences.
Incorporate Spinach and Cheeses: Add the finely chopped spinach, grated Parmesan cheese, and shredded mozzarella cheese to the mixture. Combine until the spinach is evenly distributed.
Fold in Crumbled Bacon: Gently fold in the crumbled bacon pieces, reserving a small amount for garnish if desired.
Chill the Dip: Transfer the dip to a serving bowl or a serving dish. If time allows, refrigerate the dip for at least 30 minutes to let the flavors meld. However, you can also serve it immediately if you’re in a hurry.
Garnish and Serve: Before serving, sprinkle the remaining crumbled bacon on top of the dip. You can also garnish with chopped fresh chives or green onions for extra flavor and color.
3. Spicy Potato Skins Recipe

Ingredients:
- 4 large russet potatoes
- 2 tablespoons olive oil
- 1 teaspoon paprika
- 1/2 teaspoon chili powder
- 1/2 teaspoon garlic powder
- 1/2 teaspoon onion powder
- 1/4 teaspoon cayenne pepper (adjust to your spice preference)
- Salt and black pepper to taste
- 1 cup shredded cheddar cheese
- 1/4 cup sliced green onions (optional, for garnish)
- Sour cream or ranch dressing for dipping (optional)
Instructions:
Preheat the Oven: Preheat your oven to 400°F (200°C).
Prepare the Potatoes: Wash the russet potatoes thoroughly to remove any dirt. Pat them dry with a paper towel. Prick each potato a few times with a fork to allow steam to escape during baking.
Bake the Potatoes: Place the potatoes directly on the oven rack and bake for about 45-60 minutes or until they are tender when pierced with a fork. The exact baking time may vary depending on the size of your potatoes.
Cool the Potatoes: Remove the potatoes from the oven and let them cool for about 10-15 minutes. This makes them easier to handle.
Cut and Scoop: Slice each potato in half lengthwise. Using a spoon, carefully scoop out most of the potato flesh, leaving about 1/4 inch of potato attached to the skin. Reserve the scooped-out potato for another use, such as mashed potatoes.
Season and Brush with Oil: In a small bowl, combine the olive oil, paprika, chili powder, garlic powder, onion powder, cayenne pepper, salt, and black pepper. Brush this mixture evenly over the inside and outside of each potato skin.
Bake Again: Place the seasoned potato skins on a baking sheet, skin-side down. Bake them for another 10-15 minutes, or until they become crispy and slightly golden.
Add Cheese: Remove the potato skins from the oven and sprinkle shredded cheddar cheese evenly inside each skin. Return them to the oven and bake for an additional 2-3 minutes, or until the cheese is melted and bubbly.
Garnish and Serve: Remove the potato skins from the oven and let them cool slightly. If desired, garnish with sliced green onions for a fresh, aromatic touch.
Serve with Dipping Sauce: These spicy potato skins are fantastic on their own, but you can also serve them with sour cream or ranch dressing for dipping.
Enjoy: Serve your spicy potato skins while they’re still warm and enjoy the crispy, spicy, and cheesy goodness.
Storage: If you have any leftover potato skins, store them in an airtight container in the refrigerator. You can reheat them in the oven to maintain their crispiness.
4. The Healthiest Potato Salad Recipe

Ingredients:
- 2 pounds (about 4 cups) red or Yukon Gold potatoes, cubed
- 1/2 cup Greek yogurt (plain, non-fat or low-fat)
- 2 tablespoons olive oil
- 2 tablespoons Dijon mustard
- 2 tablespoons apple cider vinegar
- 1/4 cup red onion, finely chopped
- 1/4 cup celery, finely chopped
- 1/4 cup dill pickles, finely chopped
- 2 hard-boiled eggs, chopped
- 2 tablespoons fresh dill, chopped (or 2 teaspoons dried dill)
- Salt and pepper to taste
- Optional: Chopped fresh parsley for garnish
Instructions:
Cook the Potatoes: Place the cubed potatoes in a large pot and cover them with cold water. Add a pinch of salt. Bring the water to a boil, then reduce the heat to a simmer. Cook the potatoes for about 10-15 minutes, or until they are fork-tender. Be careful not to overcook them; you want them firm but easily pierced with a fork.
Drain and Cool: Drain the cooked potatoes in a colander and let them cool to room temperature. You can speed up the cooling process by spreading them out on a baking sheet.
Prepare the Dressing: In a small bowl, whisk together the Greek yogurt, olive oil, Dijon mustard, and apple cider vinegar. This creamy and tangy dressing will be the base for your potato salad.
Combine Ingredients: In a large mixing bowl, combine the cooled potatoes, chopped red onion, celery, dill pickles, hard-boiled eggs, and fresh dill.
Add Dressing: Pour the dressing over the potato mixture. Gently fold everything together until the potatoes are evenly coated with the dressing.
Season to Taste: Taste your potato salad and add salt and pepper to your liking. Remember that you can always add more, so start with a pinch and adjust as needed.
Chill and Serve: Cover the potato salad and refrigerate it for at least 1-2 hours before serving. Chilling allows the flavors to meld and develop.
Garnish and Enjoy: Just before serving, garnish your healthy potato salad with chopped fresh parsley for a burst of color and freshness.
Serve and Savor: Enjoy your delicious and nutritious potato salad as a side dish at barbecues, picnics, or family gatherings.
Storage: Any leftover potato salad can be stored in an airtight container in the refrigerator for up to 3 days.
5. Southern-Style Biscuits Recipe
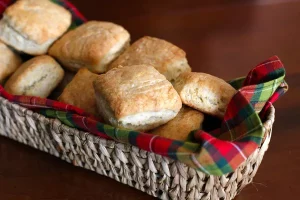
Ingredients:
- 2 cups all-purpose flour
- 1 tablespoon baking powder
- 1/2 teaspoon baking soda
- 1 teaspoon salt
- 8 tablespoons (1/2 cup) unsalted butter, cold and cubed
- 1 cup buttermilk, cold
Instructions:
Preheat the Oven: Preheat your oven to 450°F (230°C). Make sure your oven rack is in the center position.
Prepare Baking Sheet: Line a baking sheet with parchment paper or lightly grease it to prevent sticking.
Sift Dry Ingredients: In a large mixing bowl, sift together the all-purpose flour, baking powder, baking soda, and salt. Sifting helps incorporate air and ensures a lighter texture for your biscuits.
Add Cold Butter: Add the cold, cubed butter to the dry ingredients. Using a pastry cutter or your fingertips, quickly cut the butter into the flour mixture. Continue until the mixture resembles coarse crumbs with some pea-sized pieces of butter remaining.
Add Buttermilk: Pour in the cold buttermilk. Using a fork or a wooden spoon, gently stir the mixture until the dough begins to come together. Be careful not to overmix; you want the dough to be just combined.
Knead the Dough: Turn the dough out onto a floured surface. Lightly flour your hands and gently knead the dough for about 1-2 minutes. You’re not looking for a smooth dough; the goal is to bring it together.
Roll and Fold: Roll out the dough to about 1/2 inch thick. Fold the dough in half, then roll it out again. Repeat this process 4-5 times. Rolling and folding create layers in the biscuits, resulting in a flaky texture.
Cut Biscuits: Using a floured biscuit cutter or a glass, cut out biscuits from the dough. Press straight down without twisting to ensure even rising.
Place on Baking Sheet: Arrange the biscuits on the prepared baking sheet, making sure they’re close together but not touching. This helps them rise evenly.
Bake: Place the baking sheet in the preheated oven and bake for about 10-12 minutes or until the biscuits are golden brown on top and cooked through.
Cool Slightly: Remove the biscuits from the oven and let them cool on a wire rack for a few minutes.
Serve Warm: Serve your Southern-style biscuits warm. They’re best enjoyed fresh out of the oven with butter, jam, honey, or as a side for sausage gravy.
Storage: If you have leftovers, store them in an airtight container once they’ve cooled completely. To reheat, place them in a 350°F (175°C) oven for a few minutes until warmed through.
6. Goat Cheese Salad Recipe
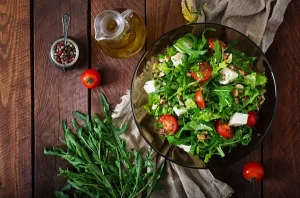
Ingredients:
- For the Salad:
- 6 cups mixed salad greens (e.g., arugula, spinach, baby kale, or your choice)
- 1/2 cup cherry tomatoes, halved
- 1/4 cup red onion, thinly sliced
- 1/4 cup toasted pecans or walnuts, coarsely chopped
- 1/4 cup dried cranberries or fresh berries (e.g., raspberries or strawberries)
- 4 oz goat cheese (chevre), crumbled
- 1/4 cup fresh basil leaves, torn or chiffonade
- Salt and black pepper to taste
- For the Vinaigrette:
- 3 tablespoons extra-virgin olive oil
- 1 tablespoon balsamic vinegar
- 1 teaspoon Dijon mustard
- 1 teaspoon honey or maple syrup (optional, for sweetness)
- 1 clove garlic, minced
- Salt and black pepper to taste
Instructions:
Prepare the Salad Greens: Wash and thoroughly dry the mixed salad greens. Place them in a large salad bowl.
Add the Cherry Tomatoes and Red Onion: Halve the cherry tomatoes and thinly slice the red onion. Add them to the salad bowl with the greens.
Toast the Nuts: In a dry skillet over medium heat, toast the pecans or walnuts for a few minutes until they become fragrant and lightly browned. Be careful not to burn them. Remove from heat and set them aside.
Incorporate the Toasted Nuts and Berries: Add the toasted nuts and dried cranberries (or fresh berries) to the salad bowl.
Prepare the Goat Cheese: Crumble the goat cheese over the salad. You can use a fork or your fingers to achieve the desired texture.
Add Fresh Basil: Tear or chiffonade the fresh basil leaves and sprinkle them over the salad. The basil adds a wonderful aromatic touch.
Season and Toss: Season the salad with a pinch of salt and black pepper, to taste. Toss all the ingredients together gently to ensure an even distribution of flavors.
Prepare the Vinaigrette: In a small bowl, whisk together the extra-virgin olive oil, balsamic vinegar, Dijon mustard, honey (if using), minced garlic, salt, and black pepper until well combined.
Dress the Salad: Drizzle the vinaigrette over the salad just before serving. You can start with half the dressing and add more if needed; this allows you to control the amount of dressing used.
Serve and Enjoy: Serve your delicious goat cheese salad immediately as a refreshing appetizer or side dish. It’s also substantial enough to be a satisfying main course when paired with a crusty baguette.
Optional Garnish: For an extra touch of sophistication, garnish the salad with a few additional crumbles of goat cheese and some freshly cracked black pepper.
Storage: If you have any leftover salad, store it in an airtight container in the refrigerator. Keep the dressing separate and add it just before serving to maintain the salad’s freshness.
7. Grilled Corn with Coconut Curry Butter Recipe
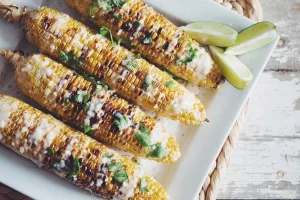
Ingredients:
- For the Coconut Curry Butter:
- 1/2 cup (1 stick) unsalted butter, softened
- 2 tablespoons coconut milk
- 1 teaspoon curry powder
- 1/2 teaspoon ground cumin
- 1/2 teaspoon ground coriander
- 1/4 teaspoon turmeric
- 1/4 teaspoon paprika
- 1/4 teaspoon cayenne pepper (adjust to your spice preference)
- Salt and black pepper to taste
- For the Grilled Corn:
- 4 ears of fresh corn, husked and cleaned
- Olive oil, for brushing
- Salt and black pepper, to taste
Instructions:
Mix the Spices: In a small bowl, combine the curry powder, ground cumin, ground coriander, turmeric, paprika, cayenne pepper, salt, and black pepper. Mix well to create a flavorful spice blend.
Blend with Butter: In a separate bowl, add the softened butter and coconut milk. Gradually incorporate the spice blend into the butter mixture, stirring until it’s well combined. Taste and adjust the seasonings if needed.
Shape and Chill: Spoon the coconut curry butter onto a sheet of plastic wrap. Shape it into a log or roll, wrap it tightly in the plastic wrap, and place it in the refrigerator. Allow it to firm up for at least 30 minutes.
Preheat the Grill: Preheat your grill to medium-high heat, about 350-400°F (175-200°C).
Prepare the Corn: Brush the cleaned and husked ears of corn with olive oil, and season them with a pinch of salt and black pepper.
Grill the Corn: Place the corn directly on the grill grates. Grill for about 10-12 minutes, turning occasionally, until the corn is charred and cooked through. The grilling time may vary depending on your grill’s heat.
Slice the Coconut Curry Butter: While the corn is grilling, remove the coconut curry butter from the refrigerator and slice it into rounds.
Serve: Once the corn is done, remove it from the grill and let it cool slightly. Place a slice of the coconut curry butter on top of each ear of corn. The heat from the corn will melt the butter, creating a luscious and flavorful coating.
Enjoy: Serve your grilled corn with coconut curry butter as a side dish at barbecues, picnics, or summer gatherings. It’s a unique and delicious way to enjoy fresh corn on the cob.
Storage: Any leftover coconut curry butter can be stored in the refrigerator for future use. It’s also delightful on grilled vegetables, chicken, or seafood.
8. Baked Beans with Bacon Recipe
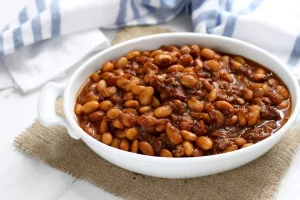
Ingredients:
- 1 pound (about 2 cups) dried navy beans
- 6 cups water
- 8 slices bacon, chopped
- 1 medium onion, finely chopped
- 1/2 cup ketchup
- 1/3 cup molasses
- 1/4 cup brown sugar
- 2 tablespoons apple cider vinegar
- 2 teaspoons yellow mustard
- 1/2 teaspoon salt (adjust to taste)
- 1/4 teaspoon black pepper
- 1/4 teaspoon paprika
- 1/4 teaspoon chili powder (optional, for a bit of heat)
- 1/4 cup water (for bean cooking)
Instructions:
Rinse and Soak: Rinse the dried navy beans under cold water and remove any debris. Place the beans in a large bowl and cover them with 6 cups of water. Let them soak overnight, or you can use the quick soak method by bringing them to a boil in a large pot, removing them from heat, and letting them sit for 1 hour.
Cook the Beans: Drain and rinse the soaked beans. In a large pot, add the beans and cover them with water. Bring to a boil, then reduce the heat to a simmer. Cook for 45 minutes to 1 hour or until the beans are tender but not mushy. Drain the beans and set them aside.
Cook the Bacon: In a large ovenproof skillet or Dutch oven, cook the chopped bacon over medium-high heat until it becomes crispy. Remove the bacon with a slotted spoon and place it on a paper towel-lined plate. Leave about 2 tablespoons of bacon fat in the skillet.
Sauté the Onion: In the same skillet with the reserved bacon fat, sauté the finely chopped onion over medium heat until it becomes translucent and starts to brown, about 5 minutes.
Prepare the Sauce: In a bowl, combine the ketchup, molasses, brown sugar, apple cider vinegar, yellow mustard, salt, black pepper, paprika, and chili powder (if using). Mix well to create the flavorful sauce.
Combine and Bake: Add the cooked beans and the crispy bacon to the skillet with the sautéed onions. Pour the sauce over the beans and stir until everything is well coated.
Bake: Preheat your oven to 325°F (160°C). Cover the skillet or Dutch oven with a lid or aluminum foil and bake for 1 to 1.5 hours, or until the beans are tender and the sauce has thickened. Check and stir occasionally; if the beans become too dry, you can add a little water to maintain the desired consistency.
Serve: Once the baked beans with bacon are cooked to perfection, remove them from the oven. Let them cool slightly before serving.
Enjoy: Serve your delicious baked beans with bacon as a side dish at your next barbecue or alongside grilled meats. They’re also a tasty addition to potlucks and family gatherings.
Storage: Any leftover baked beans can be stored in an airtight container in the refrigerator for a few days. Reheat them in the microwave or on the stove.
9. Grilled Apricots Recipe

Ingredients:
- 4-6 ripe apricots, cut in half and pitted
- 1-2 tablespoons olive oil
- 2 tablespoons honey (optional, for drizzling)
- Fresh mint leaves for garnish (optional)
Instructions:
Preheat the Grill: Preheat your grill to medium-high heat, around 400°F (200°C). Make sure the grates are clean and lightly oiled to prevent sticking.
Prepare the Apricots: Wash the apricots and cut them in half. Remove the pits.
Brush with Olive Oil: Brush the cut side of each apricot half with olive oil. This will help prevent sticking and create beautiful grill marks.
Grill the Apricots: Place the apricot halves, cut side down, on the preheated grill. Grill for about 2-3 minutes, or until they develop grill marks and start to caramelize. Keep a close eye on them, as the cooking time can vary depending on the ripeness of the apricots and the heat of your grill.
Flip and Grill Again: Gently flip the apricots using a spatula or tongs. Grill the other side for an additional 2-3 minutes, or until they are tender and have grill marks on both sides.
Drizzle with Honey (Optional): If you desire a touch of sweetness, drizzle honey over the grilled apricots immediately after removing them from the grill.
Serve and Garnish: Transfer the grilled apricots to a serving platter. Garnish with fresh mint leaves, if desired, for a burst of color and freshness.
Enjoy: Serve the grilled apricots while they’re still warm. They are delicious on their own as a light dessert, or you can pair them with a scoop of vanilla ice cream or a dollop of Greek yogurt for added indulgence.
Variations: Experiment with different toppings and flavors. Consider sprinkling cinnamon, nutmeg, or a pinch of sea salt on the grilled apricots for extra depth of flavor.
Storage: Grilled apricots are best enjoyed fresh, but if you have leftovers, store them in an airtight container in the refrigerator. You can reheat them briefly in the microwave or enjoy them cold as a sweet and smoky snack.
Conclusion
A memorable barbecue cookout isn’t just about the perfectly grilled meats; it’s also about the delicious and thoughtfully chosen sides that enhance the overall dining experience. These 9 BBQ sides encompass a wide range of flavors and textures, ensuring there’s something to satisfy every palate at your next cookout.

