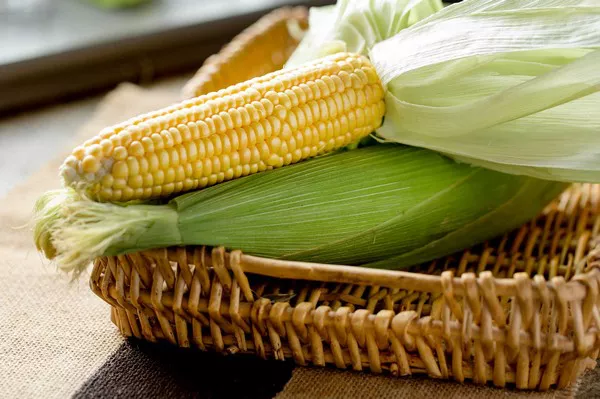
As summer brings an abundance of fresh corn to farmers’ markets and gardens, it’s the perfect time to enjoy this versatile and nutritious vegetable. Freezing corn allows you to savor its sweetness and crunch long after the season has ended. In this article, we provide a comprehensive guide on how to freeze corn, from selecting the best ears to preparing and storing them for future culinary delights.
Why Freeze Corn?
Freezing corn offers several advantages, allowing you to enjoy its flavors and nutrients throughout the year:
Preserving Freshness: Freezing locks in the freshness and flavors of corn at its peak ripeness, ensuring that you can enjoy its natural sweetness even during the off-season.
Convenience: Frozen corn is a convenient ingredient for various dishes, from soups and stews to casseroles and salads. It eliminates the need to purchase canned or pre-packaged corn.
Nutrient Retention: Freezing is a gentle preservation method that helps retain the nutritional value of corn, including vitamins, minerals, and dietary fiber.
How to Freeze Corn: A Step-by-Step Guide
Step 1: Selecting Fresh Corn
Before embarking on the freezing process, ensure you choose the best ears of corn:
Freshness: Opt for recently harvested corn that is still in its prime. The sugars in corn begin converting to starch shortly after harvest, affecting both flavor and texture.
Husk Quality: Look for ears with vibrant green husks that feel slightly damp to the touch. Avoid ears with dry, brown husks or wilted silk.
Kernels: Gently peel back a small section of the husk to examine the kernels. They should be plump, tender, and arranged in even rows.
Step 2: Preparing the Corn
Proper preparation is essential to preserve the quality of frozen corn. Follow these steps:
1. Husking and Cleaning: Remove the outer husks and any silk from the corn ears. Gently brush away any remaining silk strands.
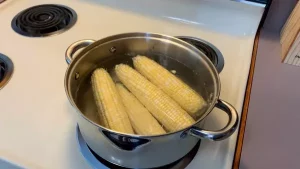
2. Blanching: Blanching is a crucial step to maintain color, flavor, and nutrients while preventing enzyme activity that can cause deterioration during freezing.
Boiling Water: Bring a large pot of water to a rolling boil.
Ice Bath: Prepare an ice bath by filling a large bowl with cold water and ice cubes.
Blanch the Corn: Immerse the corn ears in boiling water for 3-5 minutes, depending on their size. This blanching time helps neutralize enzymes and enhances preservation.
Cool Rapidly: Immediately transfer the blanched corn to the ice bath to cool rapidly and halt the cooking process.
Step 3: Cutting the Kernels
After blanching, you can either freeze whole corn ears or cut the kernels off the cob. To remove kernels:

Stand the blanched corn on its end.
Use a sharp knife to carefully slice downward, cutting the kernels off the cob. Rotate the cob as needed.
Step 4: Packaging and Freezing
Proper packaging ensures that your frozen corn remains flavorful and free from freezer burn:
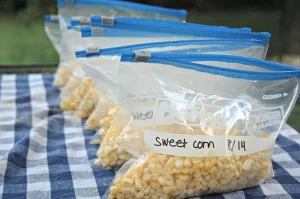
1. Portioning: Divide the corn into portion sizes that suit your cooking needs, from small bags for recipes to larger quantities for side dishes.
2. Packaging Options: Choose the packaging option that best suits your preferences and resources:
Vacuum-Sealed Bags: Vacuum-sealed bags are ideal for removing air and ensuring the corn remains fresh and free from freezer burn.
Plastic Freezer Bags: These bags are a cost-effective option. Squeeze out excess air before sealing them.
Airtight Containers: Plastic or glass containers with tight-fitting lids can also be used to freeze corn.
3. Labeling: Label each package with the date of freezing to track its freshness and ensure you use the corn within the recommended storage time.
4. Freezing: Place the packaged corn in the freezer, arranging them flat to facilitate even freezing. If using plastic bags, minimize the air inside before sealing.
Step-by-Step Guide to Freezing Fresh Corn on the Cob
Step 1: Prepare the Corn
1. Husk the Corn: Remove the outer husks from each corn ear, peeling away the layers to expose the kernels. Discard any damaged or discolored husks.
2. Remove Silks: Gently brush away any remaining silk strands using your hands or a soft brush. Rinse the corn under cool water to remove any remaining debris.
Step 2: Blanch the Corn
Blanching is a crucial step to preserve the quality of corn before freezing. It helps neutralize enzymes and maintains the corn’s color, flavor, and texture.
1. Boil Water: Fill a large pot with water and bring it to a rolling boil.
2. Prepare an Ice Bath: While the water is boiling, prepare a large bowl filled with ice water. This ice bath will quickly cool down the blanched corn and stop the cooking process.
3. Blanch the Corn: Carefully place the corn ears into the boiling water. The blanching time varies based on the size of the corn:
Small ears: 7 minutes
Medium ears: 9 minutes
Large ears: 11 minutes
4. Transfer to Ice Bath: Using tongs, immediately transfer the blanched corn to the ice water bath to cool for the same amount of time as blanching. This rapid cooling ensures that the corn retains its freshness.
Step 3: Package and Label
Proper packaging is essential to prevent freezer burn and maintain the quality of frozen corn:
1. Portioning: Divide the corn into portion sizes that suit your cooking needs. Consider how much corn you’ll use for different recipes.
2. Packaging Options: You can use vacuum-sealed bags, plastic freezer bags, or airtight containers. Squeeze out as much air as possible to prevent freezer burn.
3. Labeling: Write the date of freezing on each package or container. This helps you keep track of freshness and usage.
Step 6: Freeze
Place the packaged corn in the freezer, arranging them flat to ensure even freezing. Once frozen, you can store the corn for about 8 to 12 months.
The Shelf Life of Frozen Corn
The shelf life of frozen corn depends on several factors, including the type of corn, the freezing process, and storage conditions. Generally, frozen corn can be stored for:
1. Whole Ears of Corn: If you’ve frozen whole ears of corn, they can be stored in the freezer for about 8 to 12 months. While they may remain safe to eat beyond this timeframe, the quality may gradually decline over time.
2. Cut Corn Kernels: Frozen corn kernels have a similar shelf life of 8 to 12 months. As with whole ears of corn, the quality of cut corn may diminish slightly after prolonged freezing.
Freezing Corn Without Blanching: Is It Possible?
The Importance of Blanching
Blanching serves several purposes when it comes to freezing vegetables:
1. Enzyme Inactivation: Enzymes naturally present in vegetables can cause changes in flavor, color, and texture over time. Blanching deactivates these enzymes, preserving the quality of the vegetables.
2. Color Retention: Blanching helps maintain the vibrant colors of vegetables, preventing them from becoming dull or faded during freezing.
3. Texture Preservation: Blanching partially cooks the vegetables, helping to retain their crispness and texture when they’re later cooked.
4. Hygiene: Blanching also removes surface dirt, bacteria, and potential contaminants from the vegetables.
Best Practices for Freezing Corn Without Blanching
If you still decide to freeze corn without blanching, here are some best practices to follow:
1. Select Fresh Corn: Choose fresh, high-quality corn to start with.
2. Quick Freeze: Freeze the corn as quickly as possible after harvesting or purchasing to minimize enzyme activity.
3. Use Airtight Packaging: Package the corn in airtight, freezer-safe containers or bags to reduce the risk of freezer burn.
4. Labeling: Clearly label the packaging with the freezing date so you can keep track of how long the corn has been stored.
Using Frozen Corn
When you’re ready to use your frozen corn, follow these steps:
1. Cooking: There’s no need to thaw frozen corn before cooking. You can add it directly to soups, stews, casseroles, or sautés. If you’re making dishes that require a crisp texture, such as salads or salsas, blanch the frozen corn quickly in boiling water for about a minute before using.
2. Storage: Once you’ve used the desired amount of frozen corn, reseal the remaining portion and return it to the freezer promptly.
See Also: How to Store Vegetables to Keep Them Fresh Longer: Expert Tips
Conclusion
Freezing corn allows you to extend the joy of summer’s harvest and enjoy the taste of fresh corn throughout the year. By following proper preparation, blanching, packaging, and storage techniques, you can preserve the flavors, textures, and nutrients of corn while minimizing waste. Whether you’re looking to add a burst of sweetness to your winter dishes or save time on meal preparation, freezing corn is a practical and rewarding culinary practice.

